End of the Season: More Route Development

Morgan and I managed to get out to the mountains for one last day of bolting before, what looks like, the end of the season for anything but bouldering. And we accomplished everything we hoped to do for the day; that alone is a huge success for any day out climbing.

We set out bright and early to hit the parking lot at 9am, with the intent of adding a final pitch to the top of Family Jewels and then hopefully rap bolting another line nearby. It was a brisk start at +5°C but the sun caught the wall all morning and we left a bunch of extra clothing at the top of the first pitch (along with our spare drill bit). Linking pitches 2&3 we quickly regained our high point on the top of pitch 4 of Family jewels with me leading and Morgan carrying our pack. Morgan got a raw deal considering the pack had our water, lunch, drill, hammer, and bolts. At the belay we discussed at length whether we should head up the clean, but more difficult climbing above the belay, or head up the easier, chossy corner system to our right.

I chose the cleaner looking line and equipped with our drill set off from the belay. (Rather than my own boldness this choice was likely due to the fact that Morgan took a dramatic fall, while bolting on lead, just a week earlier when a hold ripped. Morgan took it in stride but his story made the solid rock look much more appealing.) The climbing proved to be about 5.9, maybe 10a, and super fun right off the ledge. After the first bolt it, thankfully, eased off to climbing more like the ledgy 5.7-8 terrain found on the rest of the route.

IMG_20160929_131348.jpg
The first bolt of Pitch 5 as seen from the belay. Not quite hands free drilling for the first couple bolts. Gorgeous rock though!

The pitch proved to be a bit longer than 30m so we elected to add a rappel station midway which allows the route to be rappelled with a single 60m rope. There is potential to add another pitch or two of climbing above the top of pitch 5 but it looks to be low quality, low angle climbing. It would only be worth doing if it turns out that it accesses some better climbing higher up, which might be the case.

IMG_20160929_114904_hdr.jpg
Morgan coming up to the belay ledge at the top of pitch 5.

Rappelling down, I managed to break the drill bit while adding the extra station. Morgan generously offered to be lowered down to retrieve our spare drill bit; adding a solid 65m+ of climbing to his day coming back up. During this lowering and extra climbing he scoped our next objective, a line to our right.

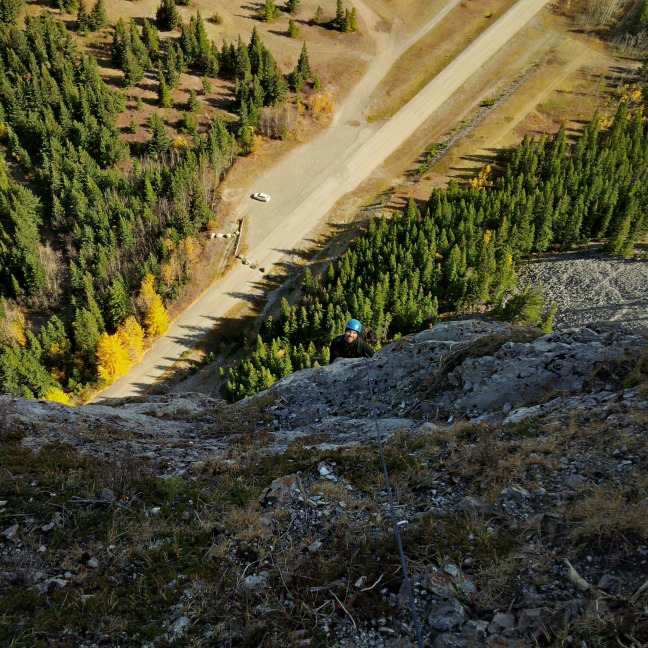
Back at the top of pitch 4 Morgan set off to my right with the drill and a bag of bolts. He placed a directional anchor and I lowered him 60 rope stretching meters while he checked out the line. From a large ledge system Morgan climbed back up on top rope, cleaning and placing bolts as he went. We had underestimated the climb and roughly half way he ran out of bolts and had to come up and restock before finishing the route.

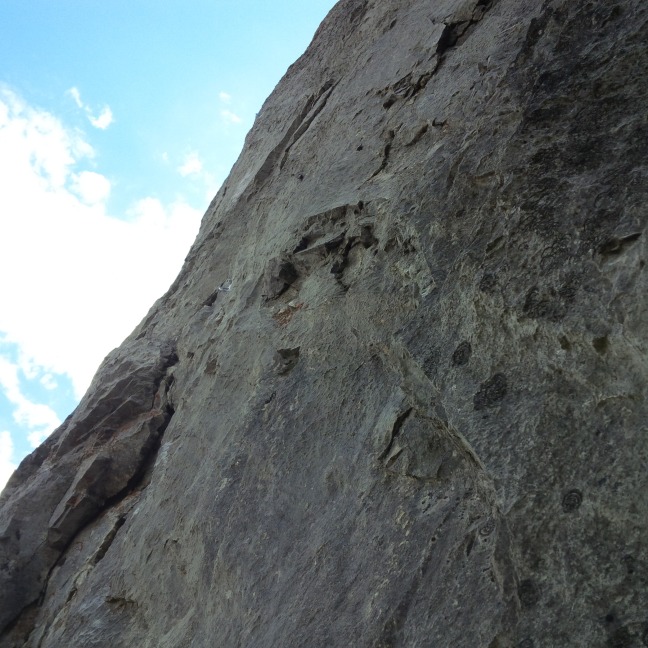
Morgan was pretty stoked when he was done so I was anxious to check out the line. We traded spots and he lowered me off and I took my turn trying it on top rope. It proved to be the best pitch I have climbed on this wall so far. 50ish meters of sustained climbing on good rock without the frequent ledges which seem to characterize the rest of the climbing we have found there. Although it is probably only around 5.8 in difficulty it is pretty technical slab and it takes a bit of wandering to find the holds that keep the climbing in that range.

It would have been nice to climb the new route from the ground but, with the extra station and broken drill bit it was getting on in the afternoon and we had both climbed all the terrain in the new line. So we decided to head out early and be home in time for supper.

A new topo is available which includes the new line (which Morgan named “Diamond in the Rough”) and the new 5th pitch on Family Jewels. We hope to get out first thing in the spring and make the first pitch of Diamond in the Rough a little more user friendly. As in my previous post, emerald wall can be found right here.

Planks on Testing

Planks are finally on. It took a lot of planing and sanding, but they are on.

After getting the planks on I was anxious to start climbing. I looked around my garage and realized: I don’t own any climbing holds. I could have mooched and borrowed holds but I thought it would be faster to just start screwing whatever crap I had laying around my garage to the wall. Morgan also volunteered some scrap wood to the effort.

IMG_20160817_162235
The completed wall and very professional looking holds. I am pretty excited about this!

Here is a gif of my first, low speed test. And yes I realize my choice of climbing pants is around 15 years behind the times. Or you can see the full video in all its glory. Most of the noise in the video is from a crane across the street, not the wall.

ezgif.com-gif-maker.gif

My initial thoughts are that the whole thing runs pretty well and feels solid. It squeaks a bit but a little more wax in the tracks will fix that. (I need to find some bee’s wax. It, apparently, is a better lubricant for wood.) The chain isn’t spaced perfectly on some of the planks which leads to thumping noises as they go over the drive sprockets. So I will be pulling off those planks to adjust their fit.

I do wish the whole thing was about 6″ taller just to lend a little more buffer when you are climbing, 12″ would be even better. I don’t think you would be able to make a wall any shorter than my 9′-2″ ceilings usable, unless you made it permanently overhanging. If I were to start from scratch I would knock a hole in the ceiling and have the top poke into the attic.

Running at ~30° overhang would let you fit the track portion of this wall under an 8′ ceiling, which would still be usable. So there are options for this to work with a lower ceiling.

After all the trouble it took to make the planks I would consider laminating 2 layers of 3/4″ plywood together to make the planks or trying 1″ plywood. This would eliminate the issues I had with twisted boards, bowed boards, and varying thickness. So it would remove labour from modifying boards while adding some by requiring gluing them together. I suspect it would lead to a better end product though. You would be able to use cheap plywood for the back layer and better stuff for the outside and it will make it easy to countersink the t-nuts so you can used the standard bolt for a given climbing hold. AND you could ensure that all the planks would fit snugly in the guide channels so they wouldn’t feel wobbly without any sanding.

Additionally, in the future, I would try including a track on the return side of the wall as well as the climbing side. This would keep the planks running vertically, and prevent the chain from rubbing on the crossmembers in the wall regardless of chain tension and wall angle. It could be a looser fitting track to keep friction down. I think this addition would make it easier to control chain tension and make the unit easier to use. I might try to add this feature to this wall just to try it out.

IMG_20160817_162257.jpg
Planks on return side aren’t in a track and sit crooked. This isn’t a huge issue but it does make chain tensions a harder to adjust, and it means when you have the wall set to overhang the chain will sag in the middle and might rub unless the chain is tight.

Next step will be electrical design. First, I think I will just purchase a prefab stepper driver, power supply, arduino etc and get this wall running as a stand-alone unit. Later I think I will design a custom board with everything on a PCB, maybe add some whizzy features like wifi so you can control it from your phone.

Lastly, I want to mention how impressed I am with my Bosch cordless rotary hammer (this one if your curious). I had only intended to use it for putting up routes, but my corded drill wasn’t suitable and I ended up using my hammer drill for everything on the planks. So it drilled around 150 t-nut holes (1/2″ x 1.5″ deep) and sunk around 150 1.5″ decking screws on about half a charge.

If you are shopping for a drill for route development this one is light enough for drilling on lead at 6.25 lbs and will punch more than a dozen 3/8″ x 3″ holes in moderately hard limestone per charge. However, if you only plan to bolt on rappel I would consider finding a heavier drill with a bigger battery (more Ah) to get a few more holes per charge. I am considering buying a bigger battery for this one; bosch makes compatible batteries with almost 3x the capacity.

Topo and Update

Hi all. This week I drew up a topo for the new route (Family Jewels 5.10b/5.8) described in last weeks blog post. It can be downloaded here. Also, I realised that neither of the topos for emerald wall include direction to find the cliff: it’s here.

I have been putting some work into the wall. Adding the planks now. This has required a bit of debugging. It has proved a little finicky. It needs everything aligned properly and a good amount of tension in the chain which, I suppose, isn’t surprising. And it is taking a little more torque than I expected to run. So I will either need to use a bigger motor, a lower ratio gear box, or just run at a lower top speed for now. Or maybe just more lube it is really only a little short on torque.

(edited 14Oct2016: topo link now goes to mini guide for Emerald Wall)